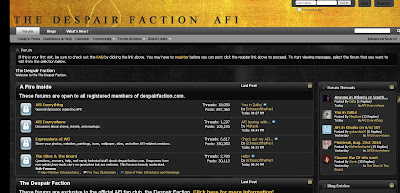
In the initial stages, we heavily relied on Internet searches to put us on the right track in terms of looking at audience research and analysis of existing music videos. In this regard, such commonly-known websites as Google and Youtube were our de facto websites of choice to search for such resources, such as music videos to analyse, album covers to look at and use to construct a mood board for our own digipak design, and websites such as http://www.uktribes.com/ and the Despair Faction forum (the official AFI fan forum/fan club) were useful for us in our early audience research. Below are screengrabs of both the UK Tribes website and the Despair Faction homepage.

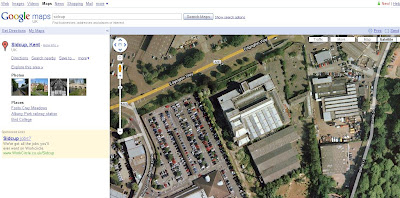
What proved also to be a valuable tool in the early stages, especially with regards to location scouting, came the Google Maps tool. With this, we were able to scout around prospective narrative locations, and also navigate a route for the performers and crew to make it to the performance location. It was by using this tool that we found that the Klinger building, as well as an old laundry building in Swanley, would be perfect locations for narrative filming. What this did do is save us time in scouting for the location itself on foot or having to try and find such locations on foot in such a manner. However, it's limitations were shown up when we arrived at the Klinger building to potentially shoot the narrative section, and building work was commencing on it, rendering it out of action for us. The same story occurred for the laundry - in fact, when we arrived, the entire site had been bulldozed and a new housing estate was being built! This is obviously the limitation of the software - that it is, indeed, often not exactly up to date. Below is a screenshot of the Google Maps software showing the Klinger building.
When it came to the filming itself, we used a standard Sony Handycam video camera, making usage of DV tapes, used in conjunction with the tripod and other equipment (see previous posts relating to Equipment). We used DV tapes as opposed to a camera with an in-built disc storage because we were safe in the knowledge that the tape format would work fine with the computers we were to use to edit, and there would be no problems with transferring the footage from tape to computer, whereas we had heard some horror stories about whole swathes of footage being rendered unusable by a format error or an incompatibility problem with cameras with inbuilt storage.
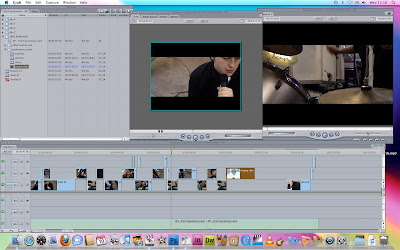
Our editing program was always going to be Final Cut Pro, readily accessible in the Media Suite in our school facilities. It offered everything we needed - extensive timelines to place multiple clips on top of one another, extensive editing options (including the letterbox cropping and colour overlay effect that was so pivotal to our video), and it was readily compatible with our cameras and tape footage right off the bat. There are alternatives we could have used, such as Adobe Premiere, or iMovie software, or even the most basic option, Windows Movie Maker, but I know from first-hand experience (in the case of Premiere and Windows Movie Maker) that none of the above software packages have nearly as much scope for potential editing and ease of working as Final Cut Pro, and I'm fairly sure we would have struggled to formulate our video as well as we did had we not had Final Cut at our disposal. Below is a screenshot which shows the full workspace of Final Cut, and the wide variety of options available.
 Below are several links to posts where I outline in great detail which elements and tools we used in Final Cut to construct our video.
Video Editing
Final Cut Editing
One source of inspiration which actually needs to be mentioned is in fact the previous school year's A2 coursework itself. Before the start of our course, we were shown the previous year's work, and it provided a real inspiration for us, as some of the videos in particular were very well made and looked fantastic. Not only did they provide us with this motivation, but they also directly inspired some of our work, in terms of use of lighting, performers, and making best use of the equipment we had at our disposal.
For the ancillary tasks, there was only going to be one software platform we would use - Adobe Photoshop (CS4 edition in our case). Simiiarly to Final Cut for film editing, Photoshop just offers such a wide range of options, and there is virtually no limits in terms of what you can create or edit on there, so it was an obvious choice to use for the ancillary tasks. Below are links to three posts where I outline in detail how exactly we used Photoshop CS4 to construct the ancillary tasks using the software to it's full potential.
Digipak Construction 1
Digipak Construction 2
Digipak Construction 3
Magazine Advert Construction
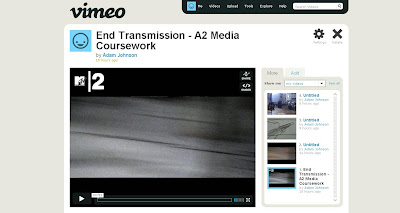
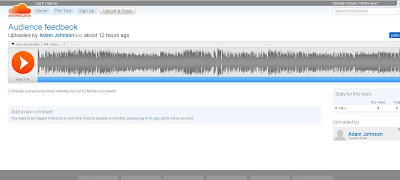
We made use of several important websites to host our work for usage in the blog posting. Firstly, we utilised the video hosting website Vimeo for hosting our various videos, including the animatic, rough cut and final cuts, and the option the Vimeo video player has of being able to be embedded in other web pages or our blog posts was incredibly useful. Similarly so was that of the sound file hosting website Soundcloud, which we used to host our audience feedback interview file. This has a similar embeddable player, which we used to post up the interview in our blogs. Below are screengrabs of our work appearing as it would on the Vimeo and Soundcloud websites, respectively.
Finally, in the Feedback stage, we used several different methods of gaining feedback from viewers. We used the video camera to record the audio interviews, and simply cut the video section out when we transferred the clips to the computer, and saved them down as audio (.m4a) files. We also used the Windows Live Messanger social networking software program to show people the video and gather their thoughts via that.
This concludes Question 4.

No comments:
Post a Comment